



Fresas com e sem corte ao centro: escolha pela estratégia de entrada
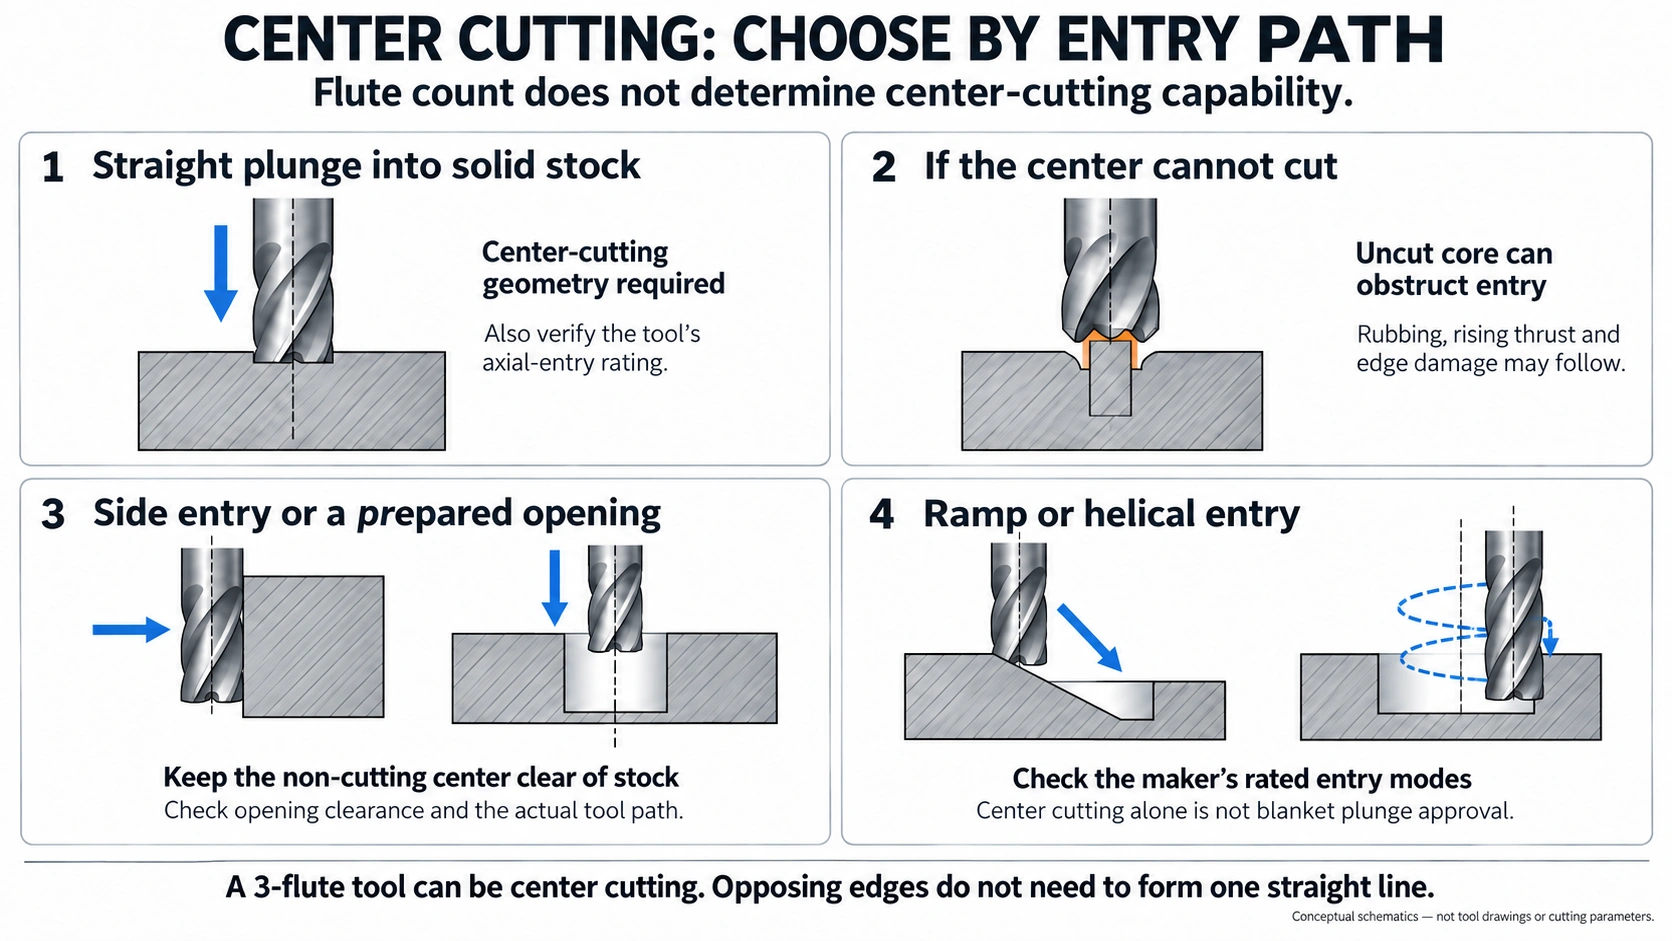
Escolha uma fresa com ou sem corte ao centro conforme o ponto onde o corte começa. Se a fresa tiver de entrar verticalmente em material maciço, precisa de geometria de corte no eixo de rotação. Isso exige uma fresa com corte ao centro. Se a operação começar pela lateral, dentro de uma cavidade existente ou através de uma abertura preparada adequada, uma fresa sem corte ao centro poderá ser apropriada.
Essa é apenas a primeira decisão. Cortar ao centro significa que a ferramenta consegue remover material no seu centro. Isso, por si só, não demonstra que uma penetração vertical seja adequada à ferramenta, ao material, à cavidade, ao porta-ferramentas e ao percurso de evacuação das aparas em questão.
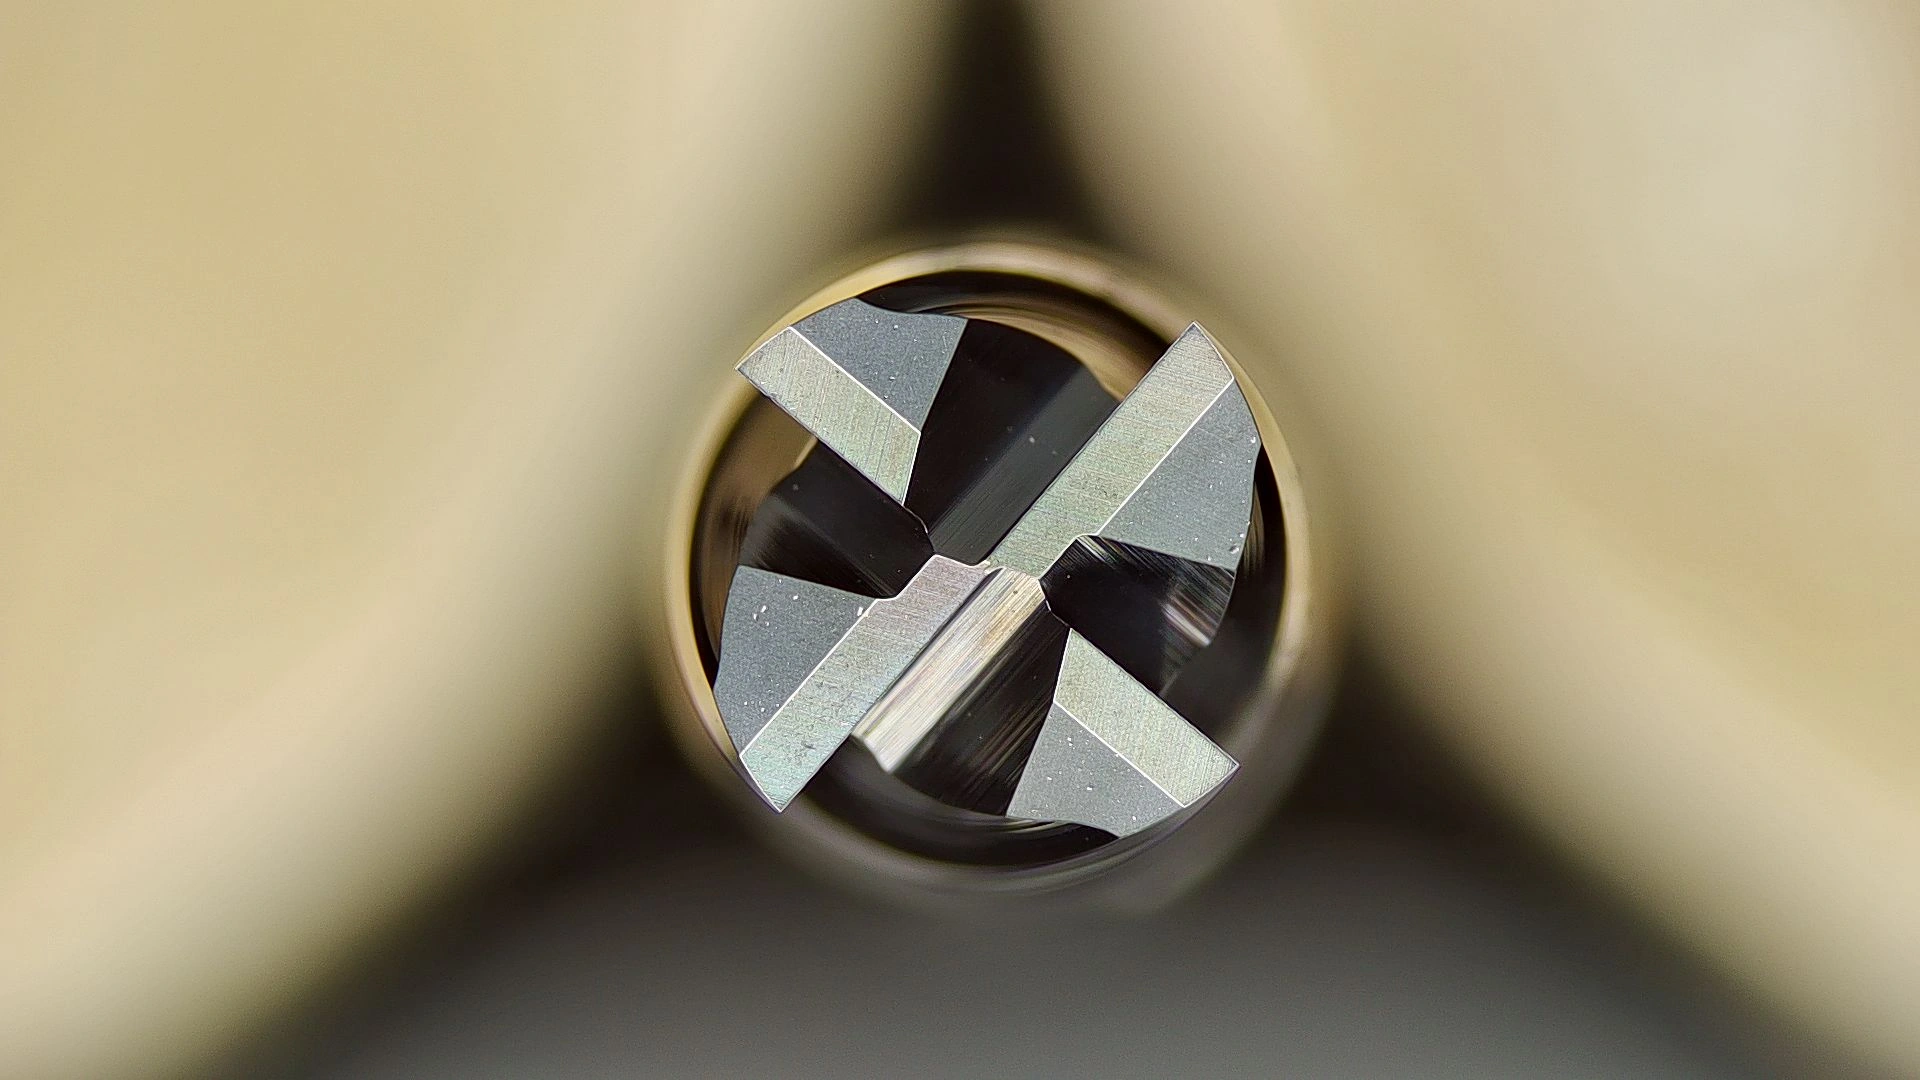
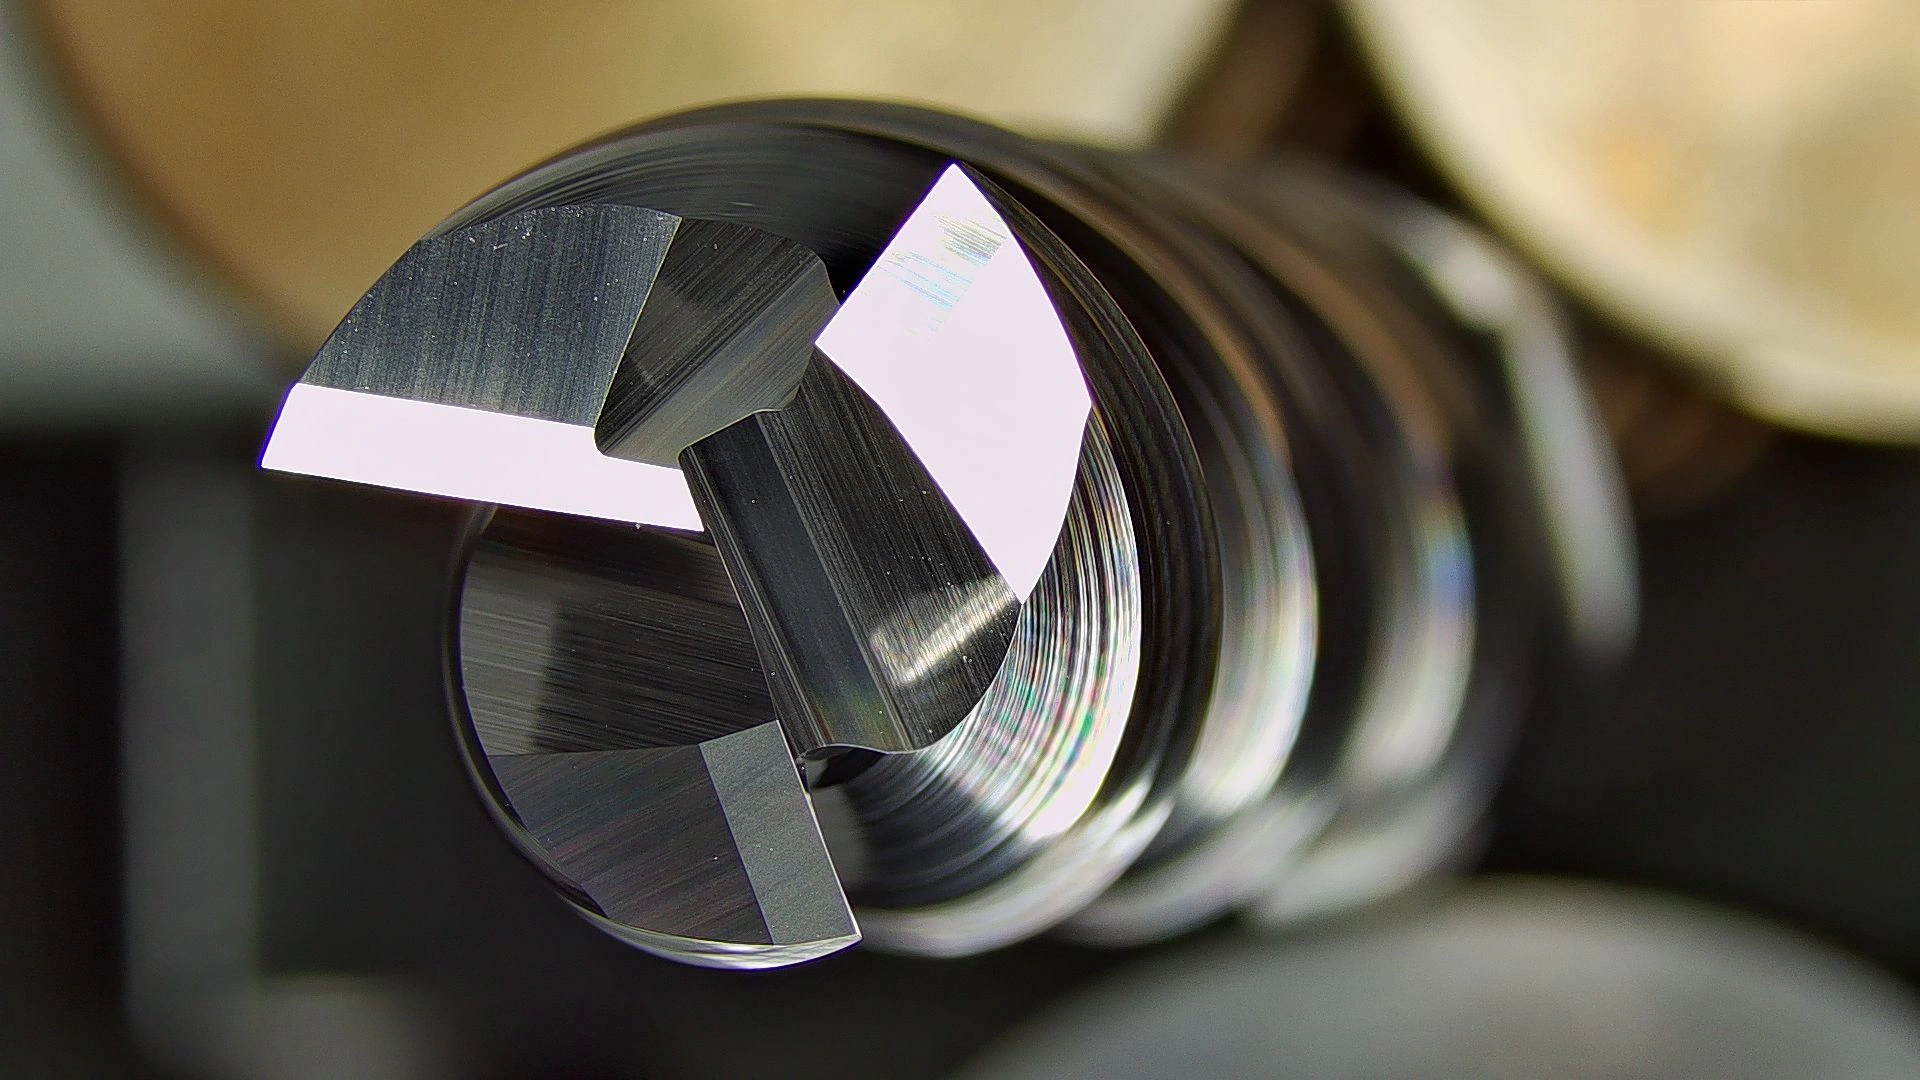
Examine a face frontal antes de ler a designação
A diferença está na face frontal da fresa. Uma fresa com corte ao centro possui pelo menos uma aresta que chega ao eixo de rotação. Um modelo sem corte ao centro deixa uma pequena zona aliviada ou não cortante no eixo. A diferença importa quando a trajetória de corte atinge o centro da face frontal da ferramenta.
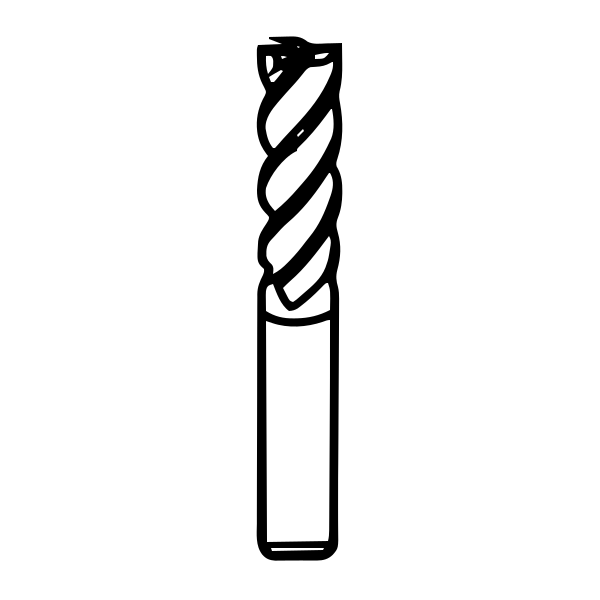
Produto relacionado: fresas de metal duro integral de topo plano. Consulte os modos de entrada permitidos nas especificações da ferramenta escolhida.
Não se baseie apenas no número de gumes. A indicação de dois, três ou quatro gumes não determina se uma determinada fresa corta ao centro. Consulte o desenho da face frontal ou as especificações do fabricante e verifique depois se o mesmo fabricante permite o movimento axial ou em rampa pretendido. A geometria responde a uma pergunta; a aptidão declarada para a aplicação responde a outra.
Escolha conforme o ponto inicial do corte
A trajetória de entrada é o critério útil de distinção. A tabela ajuda na escolha inicial; não prescreve velocidades nem avanços.
| Início previsto | Orientação geométrica | O que verificar antes do corte |
|---|---|---|
| Entrada vertical em material maciço | É necessária geometria com corte ao centro | Confirme que a ferramenta específica permite o movimento axial e que o conjunto consegue evacuar as aparas e suportar a carga. |
| Cavidade existente ou abertura preparada | Não presuma que o corte ao centro é automaticamente necessário | Confirme que a abertura e a trajetória deixam espaço livre para as arestas ativas. |
| Fresagem exclusivamente lateral | A capacidade de penetração não é automaticamente uma vantagem | Escolha conforme a operação lateral e verifique os respetivos requisitos de envolvimento, rigidez e acabamento. |
Uma fresa sem corte ao centro não deve penetrar verticalmente em material maciço. O seu centro não corta; estaria, portanto, a entrar onde não consegue cortar corretamente. Uma entrada lateral, uma cavidade existente ou uma abertura preparada podem resolver esse problema geométrico, desde que a abertura deixe espaço livre suficiente para as arestas.
A pré-furação, a entrada em rampa e a entrada helicoidal são alternativas porque podem reduzir o trabalho no centro e aplicar a carga gradualmente. Não são soluções intercambiáveis. O diâmetro da cavidade, a capacidade de rampa permitida, o espaço dos canais, a evacuação das aparas, o material e a trajetória programada podem permitir ou excluir um método. Selecione a entrada segundo os limites de aplicação da ferramenta concreta e a geometria da peça; não transfira parâmetros de penetração nem ângulos de rampa de outra família de ferramentas.
Por que o corte ao centro não autoriza qualquer penetração vertical
A penetração vertical concentra o problema na extremidade da fresa. A velocidade de corte perto do centro é baixa e as aparas têm uma saída limitada. Assim, mesmo uma ferramenta com corte ao centro pode sofrer acumulação de aparas, vibrações, ruídos agudos, deflexão, aparas filamentosas ou quebra prematura quando o movimento de entrada, a ferramenta e o conjunto não são compatíveis.
Esses sintomas são avisos, não provas de uma causa única. Pare uma entrada instável e faça as verificações seguintes antes de alterar um ângulo de rampa ou copiar parâmetros de outra operação. Inspecione ou ajuste a ferramenta apenas com a máquina parada e isolada em segurança.
Essa distinção explica uma aparente contradição nas recomendações habituais. Uma fonte pode afirmar corretamente que uma ferramenta com corte ao centro pode penetrar porque a sua geometria chega ao eixo. Outra pode recomendar furar ou entrar primeiro em rampa ou hélice porque uma aplicação de carga menos exigente é mais adequada. Ambas as afirmações podem ser verdadeiras; respondem a perguntas diferentes.
Verificação prática antes da entrada
Antes do primeiro movimento de entrada, coloque estas perguntas por ordem:
- Onde começa o corte? Se começar em material maciço no eixo da ferramenta, é necessária geometria com corte ao centro.
- O que permite a geometria frontal real? Consulte o desenho ou as especificações da ferramenta. Não deduza a capacidade de corte ao centro pelo número de gumes ou pelo nome da família.
- Que modos de entrada permite o fabricante? Uma ferramenta com corte ao centro também pode ter limitações na penetração axial, na entrada em rampa ou na interpolação helicoidal.
- A geometria permite evacuar aparas e percorrer a trajetória? Numa abertura preparada ou cavidade, verifique o espaço livre das arestas restantes. Para uma rampa ou hélice, confirme que a geometria da cavidade e a capacidade da ferramenta permitem a trajetória.
- O conjunto consegue suportar o movimento? O material, a resistência do núcleo, a geometria frontal, o espaço para aparas, o refrigerante ou ar, o batimento, a rigidez e o envolvimento continuam a fazer parte da decisão.
Se a geometria frontal ou o modo de entrada permitido não forem claros, pare e obtenha as especificações do fabricante. Uma suposição não verificada não substitui com segurança uma indicação de corte ao centro.
A distinção útil
O corte ao centro responde a uma pergunta geométrica: a ferramenta consegue remover material no seu eixo? Uma ferramenta sem corte ao centro não pode começar em material maciço nesse eixo. Adapte a face frontal à trajetória de entrada prevista e verifique depois o modo permitido pelo fabricante e o conjunto real antes de executar o movimento.