



Thread Milling vs Tapping: Diameter, Blind Holes and Cost
Tapping is often the efficient choice for a proven, repeatable internal thread. Thread milling becomes especially useful when thread diameter, fit adjustment, bottom clearance or the cost of a broken tool makes that tapping process difficult to justify. The right comparison starts with the hole you need to finish, not a general claim that one method makes better threads.
This comparison focuses on internal threads made by milling or tapping. If the part is already held on a lathe and the thread is concentric with the spindle, also consider whether turning can complete it in that setup. See thread turning vs thread milling for that machine-motion and workholding decision.
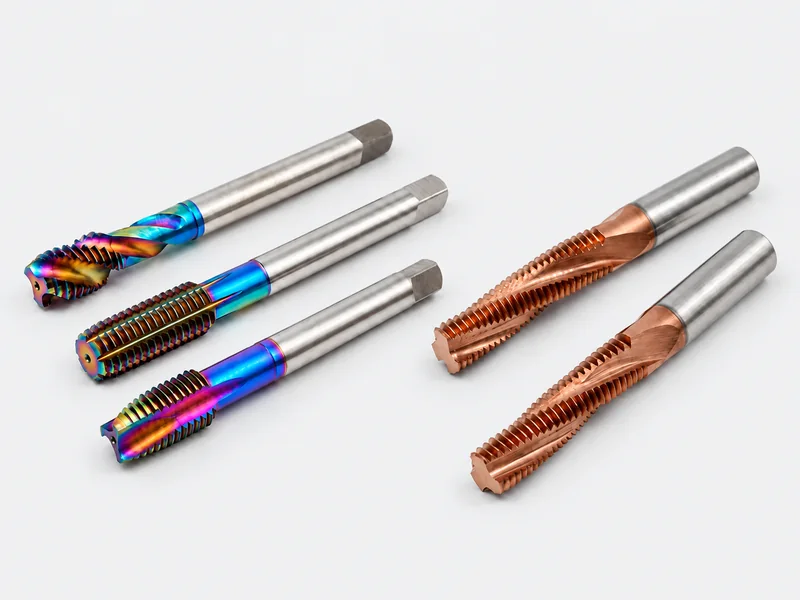
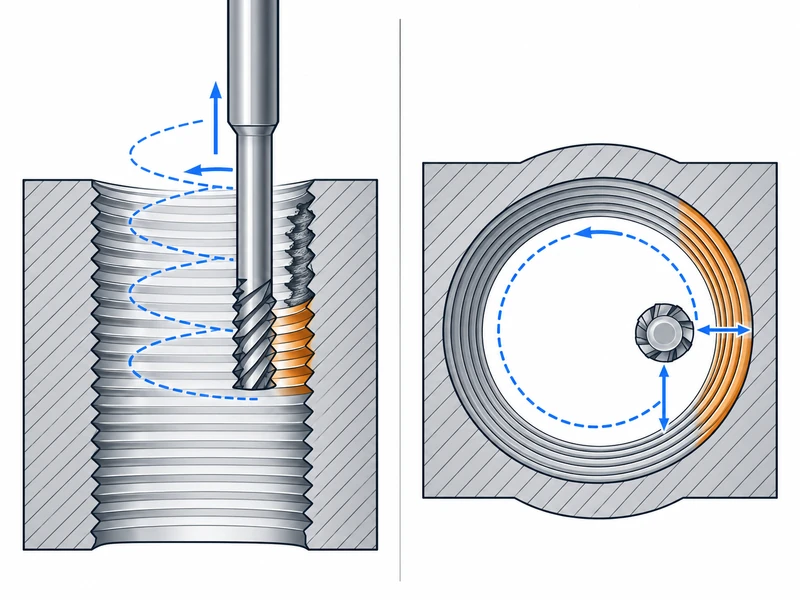
As a tapped thread becomes larger, the tap itself becomes larger. A thread mill does not have to fill the hole in the same way. That difference changes tooling cost, machine demand and how many thread sizes a shop can cover.
Why increasing thread diameter changes the comparison
A tap carries the thread form around a body sized for the thread it produces. Moving to a larger nominal diameter generally means a larger tool, along with different torque, handling and inventory requirements. Large taps are available; there is no universal diameter beyond which a thread becomes “nonstandard.” The practical question is whether the selected tap and machine make economic sense for this job.
A thread mill is smaller than the internal thread it cuts. Its cutting geometry works with a programmed helical path to generate the thread. Increasing the path radius can allow a suitable cutter to produce a larger thread diameter without increasing the cutter to that diameter.
The word suitable matters. Check the permitted thread form, pitch, minimum bore diameter, reach and diameter range. A full-profile tool intended for one pitch cannot acquire a different pitch merely through a program change. Even when two threads share a pitch, the cutter manufacturer must permit the required sizes and profiles.
This is why a shop producing occasional large threads may prefer thread milling, while a shop making the same small thread all day may retain tapping. The first gains flexibility; the second may gain more from a short, well-proven cycle. Neither conclusion follows from cutter price alone.
The prepared hole is part of the threading method
Before comparing cycle time, establish how the internal thread will be formed. Cutting taps, forming taps and thread mills do not impose identical requirements on the prepared bore.
A cutting tap removes material
The drilled hole leaves material for the tap to cut into the thread profile. Chips must have an appropriate route out of the cutting zone. A through hole and a blind hole can need different tap geometries and chip directions.
Check the recommended drill size against the thread designation, tolerance, material and selected tap. A nominal drill designation is not proof of the actual hole size: runout, wear and material behavior can change what the drill produces.
A forming tap displaces material
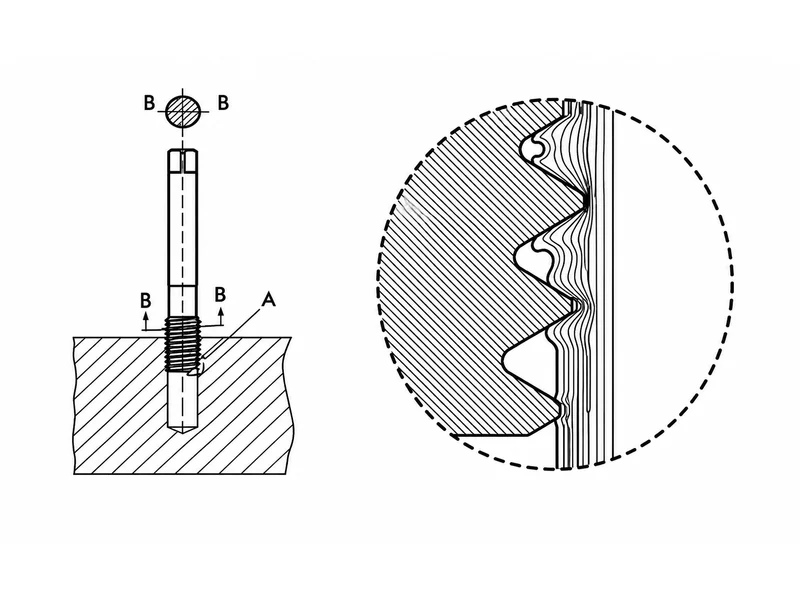
A forming tap creates the thread by plastically displacing suitable workpiece material rather than cutting chips. Its prepared hole is normally larger than the cutting-tap hole for the same thread, because only the intended amount of material should remain to be displaced.
Changing from a cutting tap to a forming tap requires a new bore-size check. Too much material raises the forming load; too little can leave an inadequate thread profile. Use the selected tap's material-specific bore recommendation and tolerance, then measure the bore rather than carrying over the old drill size.
A thread mill also needs the right starting bore
For conventional internal thread milling, prepare the bore before cutting the thread. It must meet the required minor-diameter limits and leave appropriate material for the selected cutter. It must also provide clearance for the cutter's entry and helical path.
Special combination tools can perform more than one operation, but an ordinary tap or thread mill should not be treated as a drill. Changing the threading method means reviewing the prepared-hole operation as well.
In a blind hole, compare usable thread depth
A drawing may require a certain length of full thread. The drilled depth must also accommodate the tool's lead geometry, bottom clearance and any necessary chip space. Confusing these dimensions can leave a thread that gauges at the entrance but does not provide the required engagement.
A thread mill may provide useful control near the bottom because it does not enter in the same way as a tap with a chamfered lead. It still has cutting-edge geometry, an axial position and a programmed exit to accommodate. It cannot produce unlimited full thread into a physical corner.
Before selecting either method, mark the full-thread depth and the permitted bore depth separately on the setup information. Then check the tool drawing against both. This is more useful than describing one tool as a “blind-hole solution” without confirming what it can reach.
Choose the cost you are trying to reduce
If a tapping process already holds tolerance, evacuates chips and meets the required tool life, replacing it with thread milling may add programming or cycle time without solving a problem. Keep that proven process as the baseline.
Thread milling deserves a trial when the baseline is constrained by large-diameter torque, difficult fit adjustment, multiple low-volume thread sizes or the consequences of a trapped broken tap. Diameter compensation can adjust the thread fit, whereas a tapped thread may require a different tap size or limit.
Lower recovery risk is not zero risk. A broken cutter can still damage the workpiece, and a programming error can cut the thread oversize. Evaluate the cost per accepted component, including tool changes, inspection, rework and scrap, alongside the cutting cycle.
For thread milling, calculate the programmed circular feed correctly rather than copying a straight-line milling feed. Our thread milling feeds and speeds guide explains the distinction between the tool-center path and the cutting edge.
Before the first trial
- Confirm the finished thread. Record its standard, diameter, pitch, tolerance and full usable depth.
- Measure the prepared bore. Check diameter and depth against the chosen cutting, forming or milling method.
- Check the machine and holder. Tapping needs the appropriate synchronized motion and torque; thread milling needs suitable interpolation and clearance.
- Review the complete toolpath. Include entry, bottom position and withdrawal, not just the cutting portion.
- Define acceptance. Agree the required gauging and any additional dimensional or functional checks before comparing time and tool life.
The useful result is a process that repeatedly makes the required thread. A smaller cutter, a faster cycle or a cheaper tap is valuable only when the finished component remains acceptable.